Disclosure: This Post Contains Affiliate Links; We earn a commission on purchases.
Looking for creative and sustainable ways to give new life to old and unused items? Want to reduce waste and create unique pieces for your home? Look no further than eco-friendly DIY projects that focus on upcycling and repurposing materials. By embracing the art of transforming discarded items into functional and stylish pieces, you can make a positive impact on the environment while elevating your home decor.
Key Takeaways:
- Upcycling and repurposing materials is a sustainable way to give new life to old items.
- Eco-friendly DIY projects allow you to create unique and environmentally friendly pieces for your home.
- Transform glass vases with jute rope or peel-and-stick wallpaper to add a touch of creativity to your space.
- Repurpose oyster shells, cardboard boxes, and rattan baskets to create beautiful and functional home decor.
- Get creative with your kids by involving them in kid-friendly upcycling crafts like building a princess castle from cardboard boxes.
Nautical Vase: Transforming a Glass Vase with Jute Rope
A simple glass vase can be transformed into a beautiful ocean-inspired vessel with just a roll or two of jute rope. By wrapping the jute rope around the vase row by row and securing it with hot glue, you can create a unique and visually appealing nautical vase. This project is a great way to repurpose old glass vases and add a touch of coastal charm to your home decor.
Step-by-Step Guide:
- Select a glass vase in the desired size and shape for your nautical-inspired creation.
- Gather a roll or two of jute rope, ensuring you have enough to wrap around the entire vase.
- Apply a small amount of hot glue to the bottom of the vase to secure the end of the jute rope.
- Wrap the jute rope around the vase, row by row, applying hot glue every few inches to ensure it stays in place.
- Continue wrapping the jute rope until you reach the top of the vase, ensuring a tight and even spiral pattern.
- Secure the final row of jute rope with hot glue and trim any excess rope.
- Allow the glue to dry completely, and your nautical vase is ready to be displayed!
With its rustic texture and coastal appeal, the nautical vase adds a touch of character to any room. Whether you’re decorating a beach-themed space or simply want to bring a touch of the ocean into your home, this DIY project is a fun and eco-friendly way to repurpose old glass vases.
“By transforming a glass vase with jute rope, you can create a unique and visually appealing nautical vase to add a touch of coastal charm to your home decor.”
| Materials Needed | Tools Needed |
|---|---|
| Jute rope | Hot glue gun |
| Glass vase | Scissors |
Botanical Bookcase: Upcycling an Old Cabinet with Peel-and-Stick Wallpaper
Transforming an old and dated cabinet into a stunning botanical bookcase is a fantastic way to repurpose and breathe new life into your furniture. With the help of peel-and-stick wallpaper, you can create a unique piece with a beautiful botanical design.
To get started, remove any hardware from the cabinet and prepare the wood surface by cleaning and sanding it. This will ensure a smooth and even application of the wallpaper.
Next, measure and trim the peel-and-stick wallpaper to fit the back of each shelf. Take your time to ensure precise measurements, as a perfectly fitted wallpaper will make all the difference in the final result.
Once you have your wallpaper cut, peel off the backing and carefully apply it to the back of each shelf. Begin at one corner and gradually smooth out the wallpaper, ensuring there are no air bubbles trapped underneath.
Now, you can admire your botanical bookcase as it transforms before your eyes. The combination of the repurposed cabinet and the peel-and-stick wallpaper creates a charming and nature-inspired piece of furniture that will add character to any room.
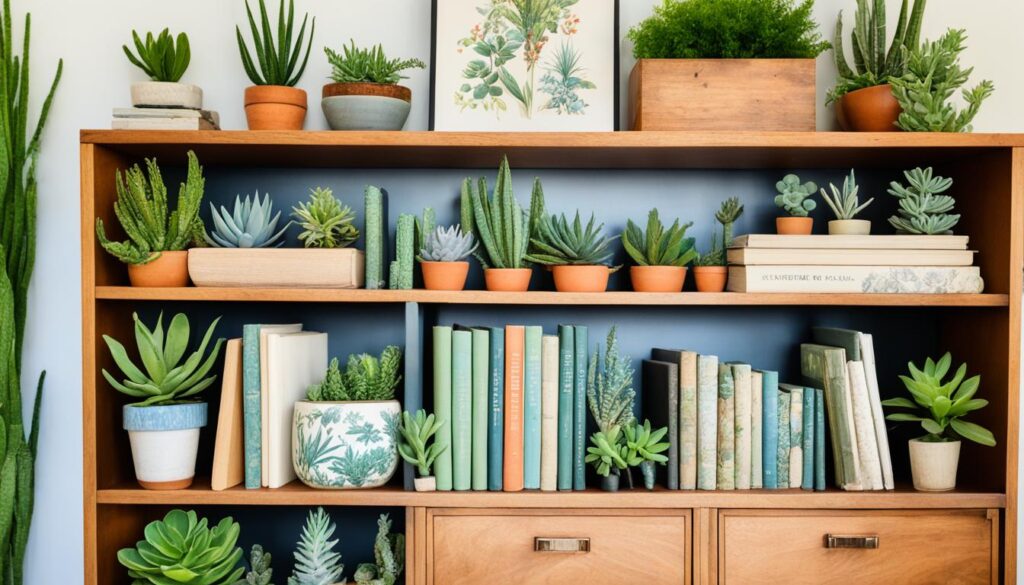
This transformation is not only aesthetically pleasing but also sustainable. By repurposing an old cabinet, you are reducing waste and giving it a new purpose. Additionally, peel-and-stick wallpaper offers a convenient and mess-free alternative to traditional wallpaper, making it easier than ever to achieve stunning results.
Here are some key benefits of creating a botanical bookcase:
- Repurposes an old and unused cabinet
- Adds a touch of nature-inspired design to your living space
- Saves money compared to buying a new bookcase
- Reduces waste and promotes sustainability
- Allows for customization and personalization
Embrace the beauty of nature and sustainability with a botanical bookcase created through cabinet repurposing and peel-and-stick wallpaper. This DIY project offers a creative and eco-friendly way to transform your furniture into a unique and visually appealing piece.
Rope Star Mirror: Upgrading a Basic Mirror with Jute Rope
Looking to add a touch of natural and rustic charm to your home decor? Consider transforming a basic round mirror into a stunning statement piece with the help of a spool of jute rope. This creative and cost-effective DIY project will elevate the style of any room and showcase your unique taste.
To create your own rope star mirror, you’ll need a few simple materials and a dash of creativity. Start by gathering the following supplies:
- A basic round mirror
- Jute rope
- Hammer and nails
- Hot glue gun
Once you have everything you need, follow these steps:
- Place the mirror on a flat surface and decide on the pattern you want to create with the jute rope. It could be a star shape, a spiral design, or any other pattern that catches your eye.
- Using the hammer and nails, secure the starting end of the jute rope to the backside of the mirror. This will serve as the anchor point for wrapping the rope.
- Begin wrapping the jute rope around the mirror, following your chosen pattern. Make sure to keep the rope taut and secure it with small dabs of hot glue along the way to prevent unraveling.
- Continue wrapping the rope until you reach the desired width or until you’ve completed the entire pattern. Trim any excess rope and secure the end with hot glue.
And voila! You’ve successfully upgraded a basic mirror into a stunning rope star mirror. Hang it on a wall or place it on a mantel or side table to instantly enhance the aesthetic appeal of any space.
“The rope star mirror is not only a stylish addition to your home decor but also a testament to your creativity and resourcefulness. It effortlessly combines natural elements with a touch of rustic charm, making it a versatile piece that complements various interior styles.” – Interior Design Expert
Add a touch of visual interest and make your mirror truly stand out with a wooden or metallic frame. Alternatively, you can incorporate other materials such as seashells or beads into your design to create a personalized and unique look.
Don’t be afraid to experiment with different patterns, rope thicknesses, and mirror sizes to create a collection of rope star mirrors that can be displayed together for a stunning visual impact.
So why wait? Unleash your creative potential and transform a basic mirror into a work of art using the timeless beauty of jute rope. Start your DIY project today and elevate the style of your home with a stunning rope star mirror!
| Benefits of the Rope Star Mirror | Materials Needed | Difficulty Level |
|---|---|---|
| ✨ Adds a touch of natural and rustic charm to any space | ✅ Basic round mirror | ⭐⭐ |
| ✨ Affordable and cost-effective DIY project | ✅ Jute rope | ⭐⭐⭐ |
| ✨ Customizable patterns and designs | ✅ Hammer and nails | ⭐⭐ |
| ✅ Hot glue gun |
Oyster Shell Trinket Dish: Repurposing Oyster Shells for Home Decor
Looking to add a touch of coastal charm to your home decor? Why not repurpose oyster shells into beautiful trinket dishes and other unique items? Oyster shells, typically discarded after enjoying a delicious seafood meal, can be transformed into stunning pieces that bring a touch of nature into your living space.
With just a few simple steps, you can turn ordinary oyster shells into functional and visually appealing trinket dishes. First, gather a collection of clean and dry oyster shells. You can collect them yourself during your beach outings or find them at local seafood restaurants.
Once you have your oyster shells ready, it’s time to add your personal touch. Consider adding printed designs or patterns to the shells to make them truly unique. Use mod podge or a similar adhesive to attach the prints onto the shells and seal them for durability.
Not only will repurposing oyster shells into trinket dishes add an eco-friendly touch to your home decor, but it will also serve as a conversation starter. Guests will be impressed by your creativity and resourcefulness in transforming something as ordinary as oyster shells into stunning pieces of functional art.
| Oyster Shell Trinket Dish | Materials Needed |
|---|---|
| 1 oyster shell | Printed designs or patterns |
| Mod podge or adhesive | Paintbrush |
| Sealer (optional) |
“Repurposing oyster shells into trinket dishes is a creative way to bring a touch of the ocean into your home while reducing waste. It’s a win-win for both your home decor and the environment.”
Whether you use these trinket dishes as a place to store your jewelry, hold paperclips on your desk, or simply display them as beautiful decor pieces, repurposing oyster shells allows you to incorporate eco-friendly elements into your lifestyle.
Next time you enjoy a seafood feast, don’t throw away those oyster shells. Instead, turn them into stunning trinket dishes and let your creativity shine!
Pendant Light: Upcycling a Rattan Basket into a DIY Light Fixture
A rattan basket can be transformed into a stylish pendant light, saving you money compared to buying one. By creating a hole in the bottom of the basket and fitting it to a semi-flush mount light, you can create a unique and eye-catching lighting fixture. This project is a great way to repurpose old baskets and add a touch of warmth and natural beauty to your home.
Repurposing with Rattan
“Repurposing old materials not only contributes to a more sustainable lifestyle but also showcases the beauty of creativity and resourcefulness.”
When it comes to upcycling, the possibilities are endless. By repurposing a rattan basket, you can create a unique pendant light that will become a statement piece in your home. Rattan is a natural material that adds warmth and texture to any space, making it the perfect choice for a DIY light fixture.
DIY Instructions
To transform a rattan basket into a pendant light, follow these simple steps:
- Clean and prepare the rattan basket. Remove any dirt or dust and ensure it is dry.
- Choose a suitable spot on the bottom of the basket to create a hole for the lightbulb socket. This can usually be done with a drill or hole saw attachment.
- Insert the semi-flush mount light into the hole, making sure it fits securely.
- Connect the lightbulb socket and wiring following the manufacturer’s instructions.
- Hang the pendant light in your desired location using a ceiling hook or fixture.
- Turn on the light and enjoy your unique and eco-friendly creation!
With just a few simple steps, you can repurpose a rattan basket into a stunning pendant light that will add character and ambiance to any room.
Your Sustainable Lighting Solution
“By upcycling and repurposing materials, you can create one-of-a-kind pieces that not only save money but also contribute to a more sustainable lifestyle.”
Repurposing a rattan basket into a pendant light is a great way to minimize waste and embrace sustainable living. Not only will you have a unique lighting fixture, but you’ll also be reducing your environmental footprint by giving new life to an old item. So, why not get creative and transform your old rattan baskets into beautiful pendant lights?
Princess Castle: Repurposing Cardboard Boxes for Kid-Friendly Crafts
Cardboard boxes are not just for packaging and storage. They can be transformed into magical princess castles through a fun and creative craft project. By using various-sized boxes, cardboard canisters, and toilet paper rolls, you can create a whimsical castle that will delight any little prince or princess.
Encouraging creativity and resourcefulness, this kid-friendly DIY project is a great way to repurpose cardboard and minimize waste. It provides an opportunity for children to engage in eco-friendly crafting while igniting their imagination.
Here’s a step-by-step guide to creating a princess castle from cardboard boxes:
- Gather your materials:
- Cardboard boxes of different sizes
- Cardboard canisters (such as oatmeal or coffee canisters)
- Toilet paper rolls
- Scissors
- Craft glue
- Decorative paper or paint
- Markers or crayons
- Optional: glitter, sequins, or other embellishments
- Construct the base:
- Choose a large box as the base of the castle.
- Cut out windows and a door for entry and play.
- Decorate the box with paint or decorative paper to create the exterior walls of the castle.
- Create additional levels:
- Take smaller boxes and stack them to create separate levels of the castle.
- Cut out windows and doors in each box.
- Decorate the boxes to match the theme of the castle, such as royal bedroom or grand ballroom.
- Use cardboard canisters as towers or turrets and attach them to the boxes.
- Add details and embellishments:
- Use toilet paper rolls as columns or pillars.
- Decorate the rolls with markers or paint to resemble marble or stone.
- Attach the columns to the corners of the castle or along the walls.
- Add decorative embellishments like glitter, sequins, or ribbons to make the castle sparkle and shine.
- Let the imagination soar:
- Encourage your child to decorate the interior of the castle with imaginative details.
- Provide small dolls or action figures that can inhabit the castle.
- Encourage creative play and storytelling within the magical castle.
This DIY project not only engages children in hands-on crafting but also promotes sustainability by repurposing cardboard and reducing waste. Plus, it provides endless hours of imaginative play and fun.
So, gather your materials, grab those cardboard boxes, and let the fairytale begin!
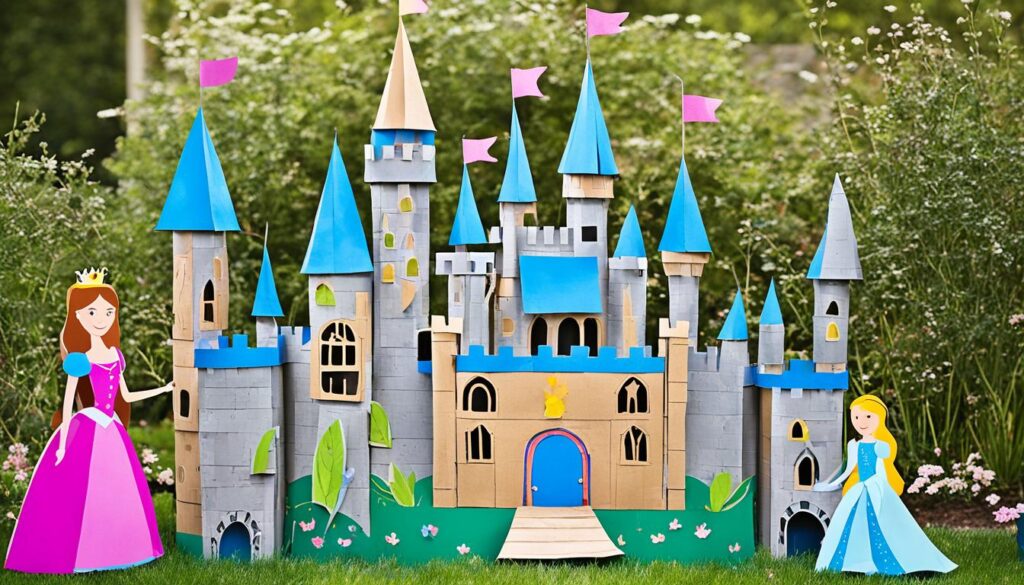
Materials Needed for Princess Castle
| Materials | Qty |
|---|---|
| Cardboard boxes of different sizes | Multiple |
| Cardboard canisters | 2-3 |
| Toilet paper rolls | Multiple |
| Scissors | 1 pair |
| Craft glue | 1 bottle |
| Decorative paper or paint | As needed |
| Markers or crayons | As needed |
| Optional: glitter, sequins, or other embellishments | As desired |
Conclusion
Eco-friendly DIY projects provide an exciting opportunity to unleash your creativity while making a positive impact on the environment. Through the art of upcycling and repurposing, you can transform old and unused items into unique and environmentally friendly pieces for your home. By embracing these projects, you contribute to reducing waste and promoting sustainability.
From the simple yet charming nautical vases created by wrapping jute rope around glass vessels to the stunning botanical bookcase made from an old cabinet and peel-and-stick wallpaper, these DIY projects showcase the power of resourcefulness and imagination. By harnessing your creative abilities, you have the ability to make significant changes by reimagining the potential of everyday objects.
Not only do eco-friendly DIY projects allow you to express your personal style, but they also serve as an inspiration to others. Through your sustainable creations, you can motivate friends, family, and the wider community to embrace the principles of reuse, reduction, and recycling. By exemplifying the value of repurposing, you assist in fostering a more sustainable future for our planet.
So, why not embark on a journey of innovation and eco-consciousness? By trying out these eco-friendly DIY projects, such as repurposing oyster shells as trinket dishes or transforming a rattan basket into a unique pendant light, you can make a difference. Happy crafting, and remember, your creativity has the power to transform the world, one repurposed object at a time!
Source Links
- https://www.weareteachers.com/earth-day-crafts-classroom-activities/
- https://www.goodhousekeeping.com/home/craft-ideas/how-to/g139/genius-upcycling-ideas/
- https://youthsustainability.org/eco-friendly-diy-projects-for-teens/

Subscribe to Our Newsletter

